
Perfect Sourdough Bread Recipe (Step-by-Step Guide for Beginners)
If you’re here, you’re probably curious about baking your own sourdough bread. While making a great sourdough loaf takes time, practice, and patience, it is incredibly rewarding. This simple sourdough bread recipe for beginners will walk you through every step and share helpful tips to help you succeed with your very first loaf.
Why I Started Baking Sourdough Bread
Another reason I started baking my own bread was because I became increasingly disappointed with the bread available in most stores. Many supermarket breads are highly processed, filled with additives and preservatives, and honestly, they often lack real flavor.
When I began focusing more on anti-inflammatory foods and nourishing ingredients, sourdough baking naturally became part of that journey. Traditional sourdough fermentation supports better digestion and helps create a more balanced way of enjoying bread.
For me, learning to bake sourdough at home was not only about making better bread — it was about reconnecting with real food and simple ingredients.
Ingredients and Tools for Sourdough Bread
- Sourdough Starter: You will need an active sourdough starter. If you don’t have one yet, you can find my simple sourdough starter recipe HERE. Make sure to start it about 7 days before baking. I usually feed my starter with either 100% rye flour or whole wheat flour.
- Flour: For this recipe, I use bread flour, which helps create a strong gluten structure and gives the bread its beautiful texture.
- Water: You can use tap water for baking bread — I do. But filtered or bottled water works just as well. The important thing is that the water should be lukewarm, not cold.
- Salt: I recommend using unrefined sea salt. Just make sure it doesn’t contain anti-caking agents or additives.
- Proofing Basket (Banneton): You can use a proofing basket like this one, or simply a bowl lined with a floured kitchen towel.
- Bread Lame or Sharp Knife: For scoring the dough before baking, I use a bread lame. It allows you to make clean, controlled cuts that help the bread expand beautifully in the oven.
- For baking sourdough bread, I find that a 5.5–6 liter Dutch oven works best. This size gives the bread enough space to expand properly while baking and helps create a beautiful crust.
However, the ideal pot size also depends on the size of the loaf you are baking. Smaller loaves can easily be baked in a smaller pot. The most important thing is that the dough has enough room to rise and expand in the oven. A heavy cast iron Dutch oven works particularly well because it traps steam during baking, which helps create that classic crispy sourdough crust.
How to Make Sourdough Bread (Step-by-Step Guide)
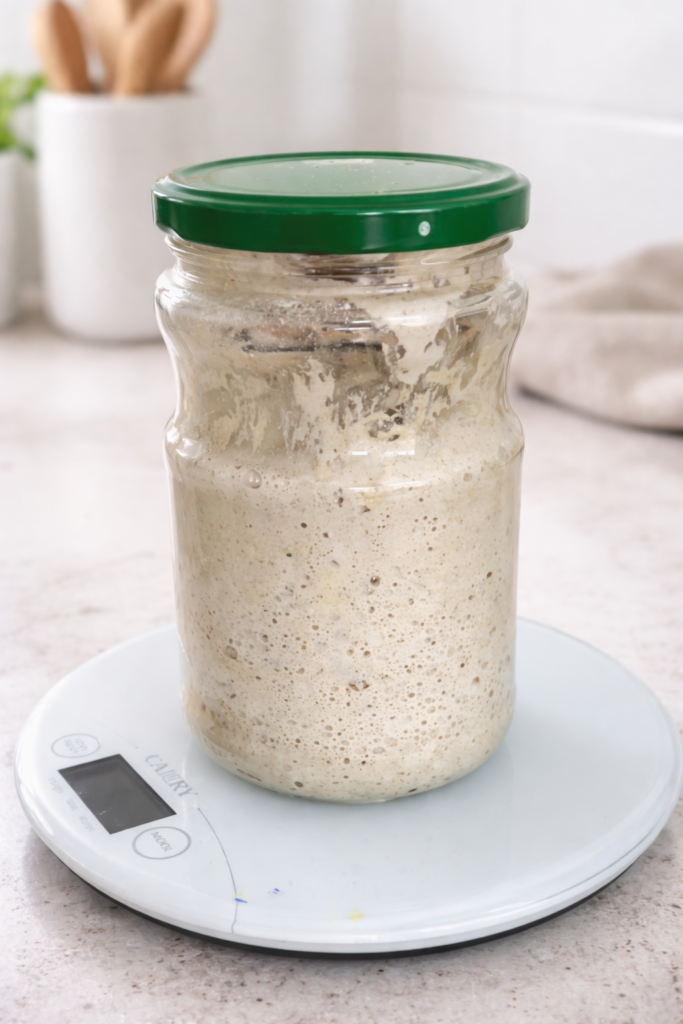
8:00 PM (the night before): Feed your sourdough starter
At around 8:00 PM the evening before baking, feed your sourdough starter so it will be active and ready the next morning.
For feeding, I usually use:
- 50 g active sourdough starter
- 100 g rye flour
- 100 g lukewarm water
Mix everything well and leave the starter at room temperature overnight. By morning, it should be bubbly, active, and ready to use for baking.
8:00 AM – Mix the Flour and Water (Autolyse)
In a large mixing bowl, combine the flour and water and mix until no dry flour remains. This step is called autolyse.
Autolyse is a simple but important step in sourdough baking. During this short resting period, the flour fully absorbs the water and the gluten begins to develop naturally. This helps create a stronger dough, improves the texture of the bread, and makes the dough easier to work with later.
After mixing the flour and water, let the dough rest for about 30–40 minutes before adding the sourdough starter and salt.
8:30 AM – Add the Starter and Knead the Dough
Once the autolyse period is complete, it’s time to knead the dough.
Add the sourdough starter to the flour and water mixture. The dough can be kneaded by hand, or you can use a stand mixer with a dough hook. I personally prefer using a mixer because it makes the process easier.
Knead the dough for about 4–5 minutes, until the starter is fully incorporated and the dough begins to come together.
Next, add the salt and knead for one more minute to evenly distribute it throughout the dough.
Once the dough is smooth and well mixed, cover the bowl and let it rest for 30 minutes before starting the stretch and fold process.
9:00 AM – First Stretch and Fold
Perform the first stretch and fold.
Grab one edge of the dough and gently stretch it upward until you feel resistance. Then fold the dough back over itself toward the center.
Turn the bowl a quarter turn and repeat the same motion: stretch the dough upward and fold it back over itself. Continue this process until you have worked your way all the way around the bowl (about four stretches and folds in total).
Cover the bowl and let the dough rest.
This step helps strengthen the gluten structure and gradually builds.
From this point on, perform two more sets of stretch and folds over the next two hours. The easiest way to do this is to set a timer for every 30 minutes.
However, don’t worry if the timing isn’t perfect. If your intervals are a little shorter or longer, that’s completely fine — sourdough baking is very forgiving.
~10:30 AM – Begin Bulk Fermentation
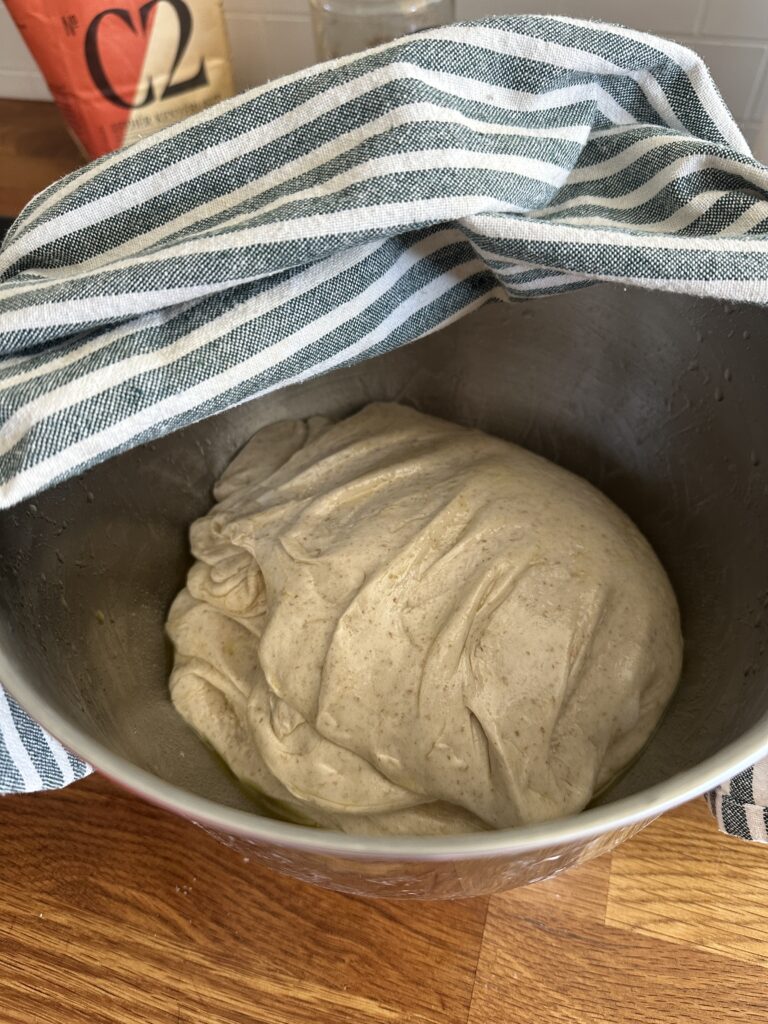
After the final stretch and fold, cover the bowl and leave the dough to bulk ferment.
During bulk fermentation, the dough will slowly rise and develop flavor as the natural fermentation continues.
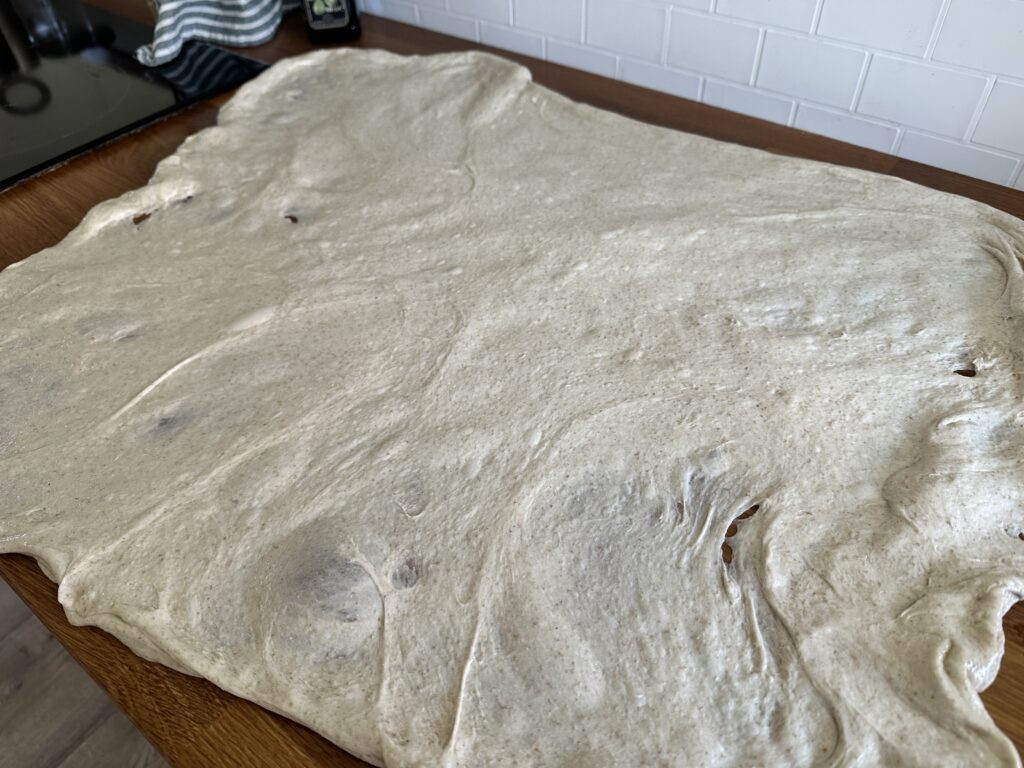
11:15 AM – Lamination
After about 45 minutes of fermentation, it’s time to perform lamination. This step helps strengthen the dough structure and encourages the development of beautiful air pockets inside the bread.
Lightly coat your work surface with a small amount of olive oil. This prevents the dough from sticking and allows it to stretch easily without adding extra flour.
Gently place the dough onto the oiled surface and carefully stretch it outward using your hands until it forms a large, thin sheet. Try to stretch the dough evenly without tearing it.
Once the dough is stretched out, fold it back over itself — first fold one side toward the center, then the opposite side. After that, fold the top and bottom toward the center until the dough forms a neat package again.
Place the dough back into the bowl and cover it.
I usually repeat this lamination process twice, allowing the dough to rest for about 45 minutes between each lamination. This helps further strengthen the dough and improves the final crumb structure.
Lamination helps distribute the gas bubbles throughout the dough and contributes to an open, airy crumb in the final sourdough loaf.
After completing the second lamination, place the dough back into the bowl and cover it.
Allow the dough to rest and ferment for about 1 hour. During this time the dough will continue to develop structure and build strength while the fermentation process progresses.
You may start to notice small bubbles forming inside the dough and the surface becoming slightly smoother and more elastic. This is a good sign that the dough is developing properly.

Shaping the Dough
Once the fermentation process is complete, it’s time to shape the dough.
Lightly flour a clean work surface.
Gently turn the dough out onto the floured surface. If the dough sticks to the bowl, carefully loosen it with your hands or a dough scraper.
Stretch the dough slightly into a rough square shape.
Next, fold the dough into thirds. Take one edge of the dough and fold it toward the center, about halfway across. Then take the opposite edge and fold it over the top, similar to folding a letter or envelope.
Finally, gently pull the dough toward yourself along the work surface to create surface tension and form a tight round ball.
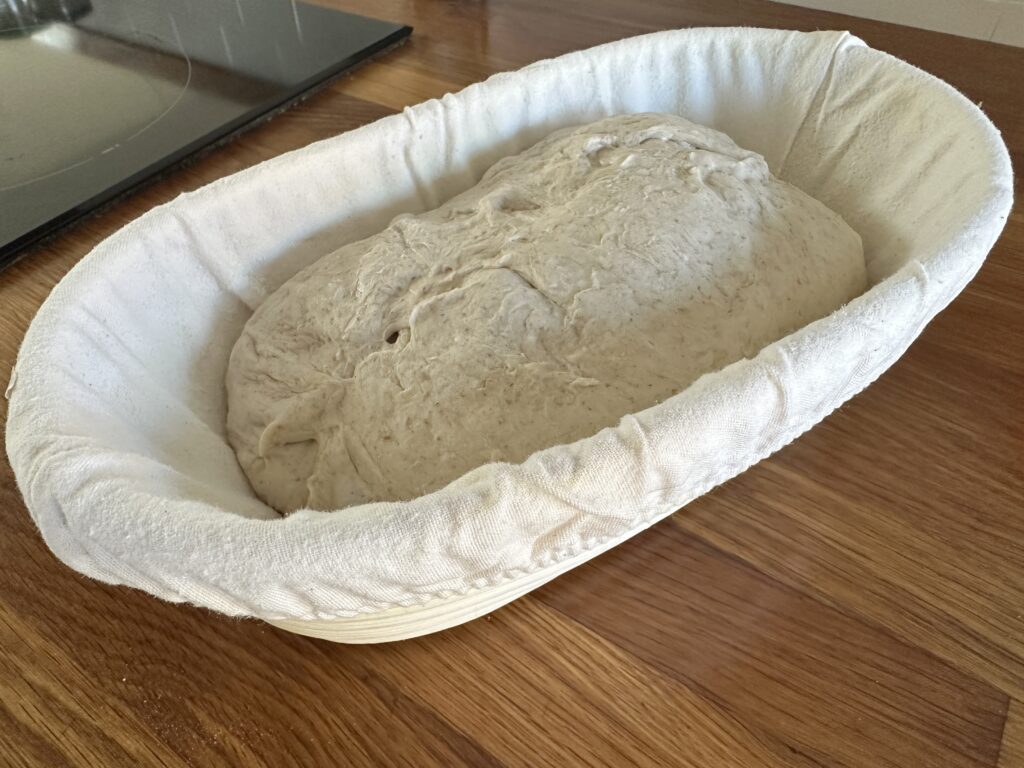
Place the shaped dough into a floured banneton basket, seam side up.

Cold Fermentation
Place the shaped dough into the refrigerator for cold fermentation.
Cover the dough loosely with a clean kitchen towel and store it in the refrigerator at around 5–7°C (41–45°F). Allow the dough to ferment slowly for 12–24 hours.
This long, slow fermentation helps develop deeper flavor in the bread and improves the structure of the crumb. It also makes the dough easier to score and bake the next day.
When you are ready to bake, the dough can go directly from the refrigerator into the oven.
Baking the Sourdough Bread
After the dough has rested in the refrigerator for at least 24 hours, it’s time to bake the bread.
I bake my sourdough bread in a cast iron Dutch oven, which helps create steam during baking and results in a beautiful crispy crust.
Preheat your oven to 250°C (480°F). Place the empty Dutch oven with its lid inside the oven while it preheats. Allow the pot to heat thoroughly so it is very hot when the dough goes in.
A properly preheated Dutch oven helps the bread rise quickly in the oven and develop a nice crust.
Remove the dough from the refrigerator and gently turn it out onto a piece of square baking parchment paper.
Using a bread lame or a very sharp kitchen knife, score the dough.
Make a confident, decisive cut along the side or top of the loaf. The cut should be about 0.5–1 cm deep. Try to hold the blade at a slight angle and make the cut in one smooth motion rather than several small cuts.
This scoring allows the bread to expand in a controlled way during baking. Without scoring, the loaf may crack unpredictably as the steam inside tries to escape.
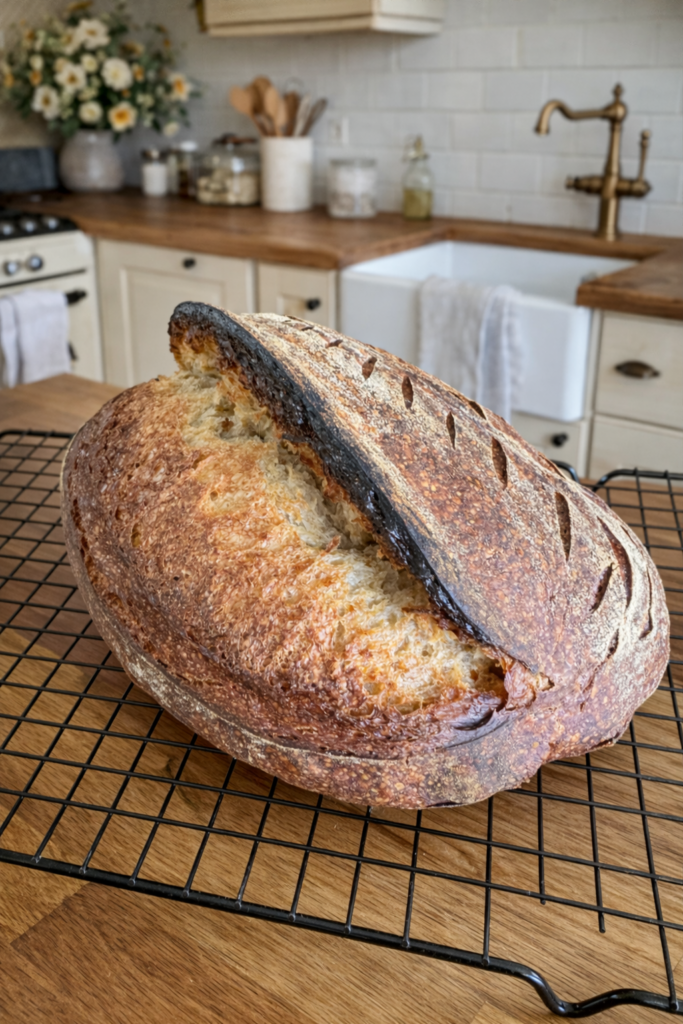
The cut will open beautifully in the oven and create the characteristic “ear” that sourdough bread is known for.
Once the dough has been scored and the oven is fully preheated, it’s time to bake the bread.
To create steam in the oven, you can either place a small amount of water in a heatproof dish inside the oven, or drop two ice cubes into the hot Dutch oven just before placing the dough inside. The steam helps create a beautiful crispy crust.
Carefully remove the hot Dutch oven from the oven and take off the lid.
Using the baking parchment paper, gently lift the dough and place it into the hot pot (together with the parchment paper).
Place the lid back onto the Dutch oven and carefully return it to the preheated oven.
Baking Time and Temperature
Bake the bread at 250°C (480°F) with the lid on for 20 minutes.
After 20 minutes, carefully remove the lid from the Dutch oven and reduce the oven temperature to 220°C (430°F).
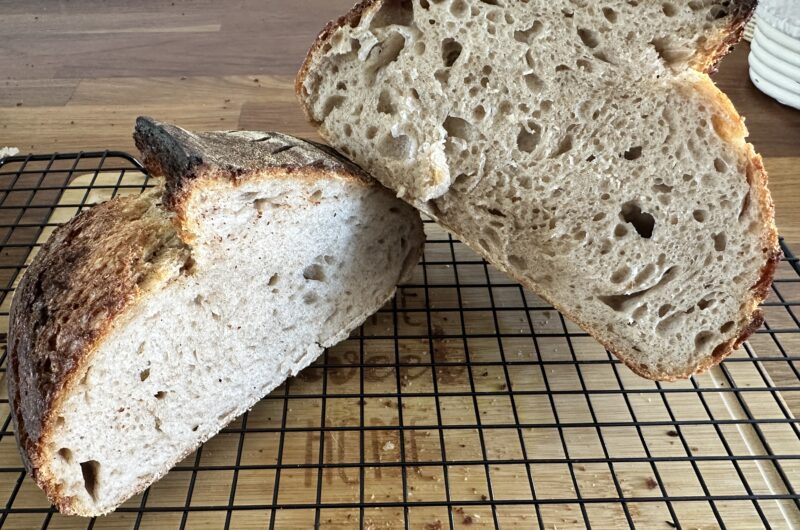
Continue baking the bread for another 30–35 minutes, until the crust becomes deep golden brown and beautifully crisp.
This second stage of baking allows the crust to fully develop and gives the sourdough bread its characteristic color and texture.
Cooling the Bread
Once the bread is fully baked, carefully remove the Dutch oven from the oven.
Using the baking parchment paper, immediately lift the bread out of the pot.
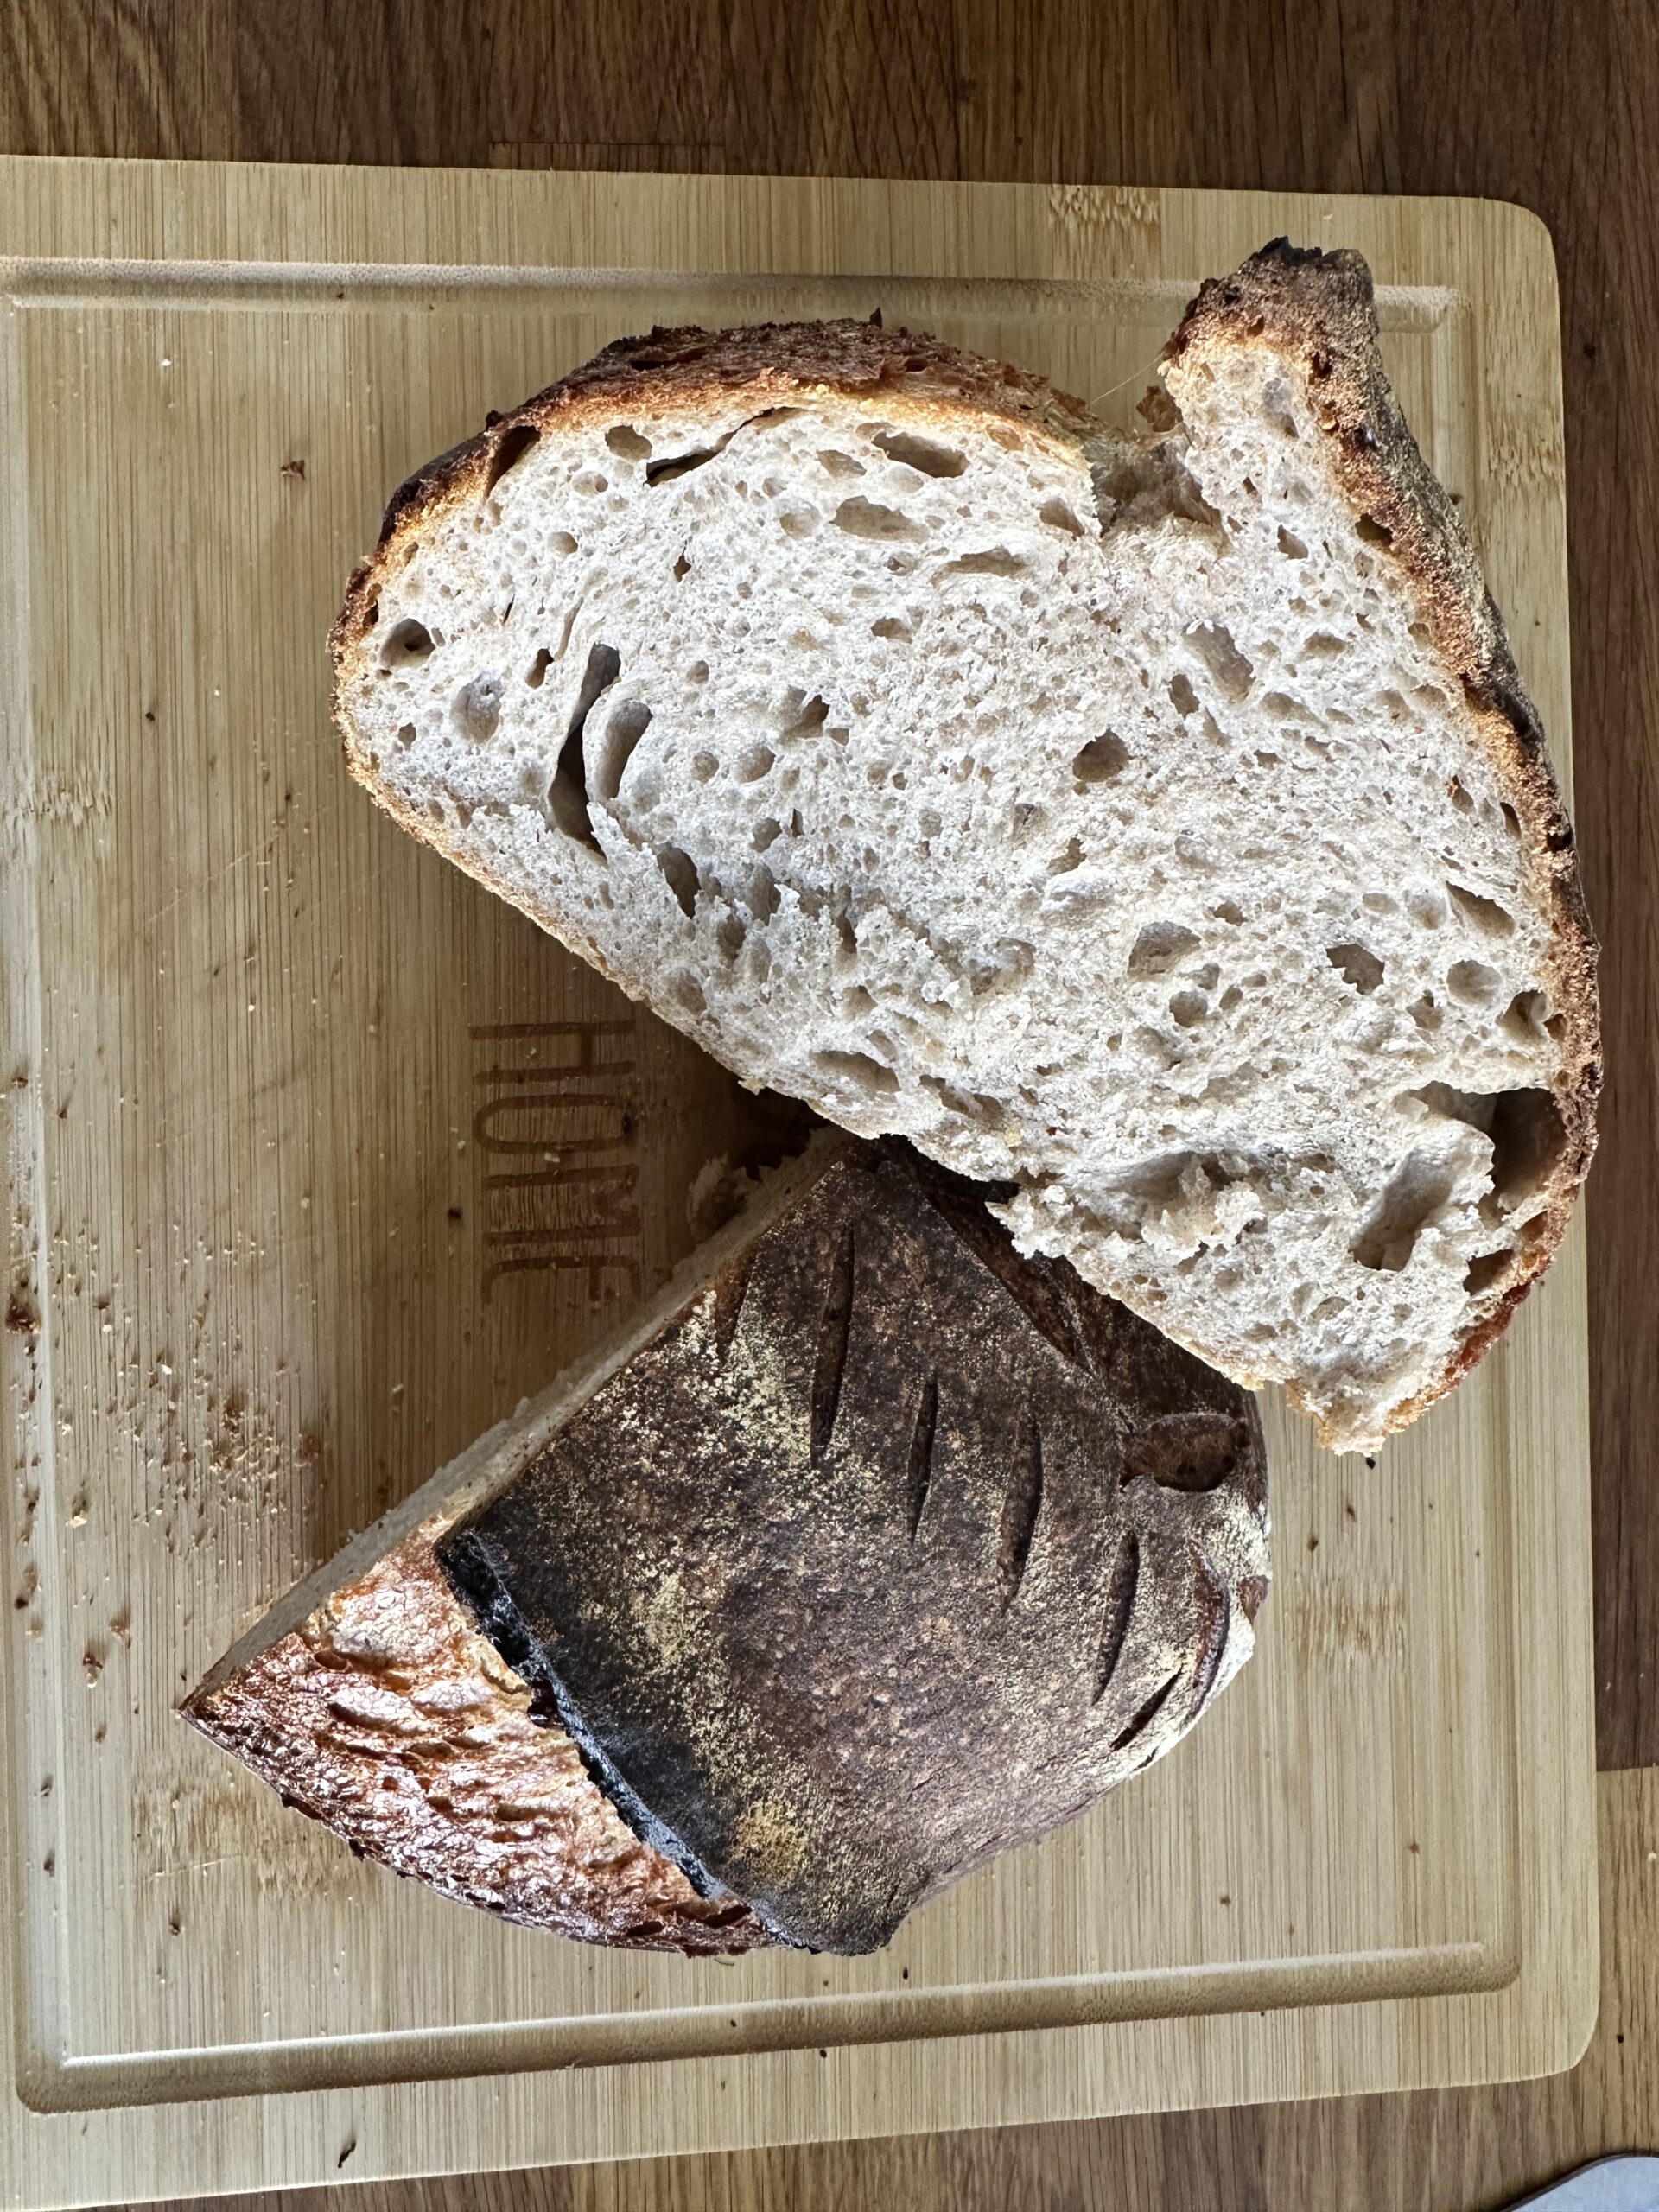
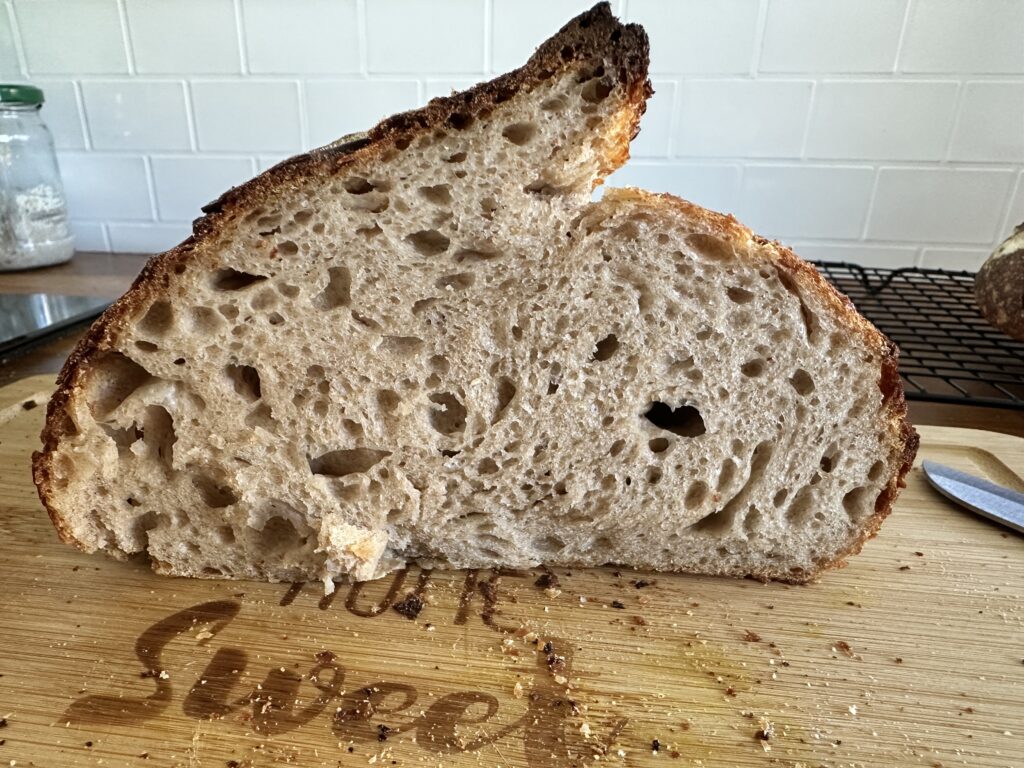
Place the loaf onto a wire cooling rack and allow it to cool completely before slicing.
Do not leave the bread inside the hot Dutch oven after baking, as the bottom of the loaf can easily burn from the remaining heat.
Allowing the bread to cool properly also helps the crumb set and improves the final texture of the sourdough bread.
Closing Section
I hope this guide inspired you to start baking your own sourdough bread and that it helped you understand the process a little better.
Sourdough baking takes practice, but it’s an incredibly rewarding journey. With time and patience, you’ll soon be baking beautiful loaves at home.
If you enjoyed this recipe and found it helpful, I would love to hear from you! Feel free to leave a comment below and share your baking experience.
And if you’d like to see more recipes and baking inspiration, follow me on Pinterest where I share new ideas and tips regularly.
Thank you so much for reading and happy baking!
Perfect Sourdough Bread Recipe (Step-by-Step Guide for Beginners)
Course: BreadCuisine: EuropeanDifficulty: Beginner4
servings6
minutes6
hours40
minutes188
kcalA beginner-friendly sourdough bread recipe with simple step-by-step instructions, a soft interior, and a crisp golden crust.
Ingredients
450g (3½ cups) bread flour
300ml (1 ¼ cups) lukewarm water
11g (2 teaspoons) sea salt
150g (½ cup + 2 tablespoons) sourdough starter
Directions
- The evening before baking (around 8:00 PM), feed your sourdough starter so it becomes active and bubbly by morning.
- In a large bowl, mix the bread flour and lukewarm water until no dry flour remains.
Let the dough rest for 30 minutes. - Add the active sourdough starter to the dough and knead for 4–5 minutes (by hand or with a mixer).
Add the salt and knead for 1 more minute.
Cover the bowl and let the dough rest for 30 minutes. - Grab one edge of the dough, stretch it upward, and fold it over itself.
Turn the bowl and repeat until you have completed a full circle around the dough.
Cover and let the dough rest. - Perform additional stretch and fold sets during the next two hours, roughly every 30 minutes.
- Lightly coat your work surface with olive oil and gently stretch the dough into a large thin sheet.
Fold the dough back onto itself and return it to the bowl.
Repeat the lamination twice, allowing 45 minutes of rest between each lamination. - After the second lamination, place the dough back in the bowl and allow it to ferment for about 1 hour until small bubbles appear and the dough becomes airy.
- Lightly flour your work surface and gently turn the dough out.
Stretch the dough into a rough square and fold it like an envelope.
Pull the dough toward yourself to form a tight round loaf. - Place the dough in a proofing basket and cover it with a clean kitchen towel.
Refrigerate at 5–7°C (41–45°F) for 12–24 hours. - Preheat the oven to 250°C (480°F) with a Dutch oven inside so it becomes very hot.
- Remove the dough from the refrigerator and place it on parchment paper.
Score the dough with a bread lame or sharp knife, making a confident cut about 0.5–1 cm deep. - Carefully place the dough into the hot Dutch oven.
Bake 20 minutes at 250°C with the lid on.
Remove the lid, reduce the temperature to 220°C, and bake for another 30–35 minutes until the crust becomes deep golden brown. - Remove the bread from the pot immediately using the parchment paper.
Place the loaf on a wire rack and allow it to cool completely before slicing.
Notes
- Stretch and fold timing
The waiting time between stretch and fold sets may vary depending on the temperature of your kitchen.
If your kitchen is warmer than 24°C (75°F), the dough will ferment faster. In this case, you can shorten the resting time between stretch and fold sets.
Always observe the dough rather than strictly following the clock. - Flouring the proofing basket
When flouring your proofing basket, it’s best to use a coarser flour, such as rye flour, masa flour, or rice flour. These flours prevent the dough from sticking and help the loaf release easily from the basket.


[…] Once your starter is active, you can bake a loaf.👉 Next: Beginner Sourdough Bread Recipe (Soft Inside, Crispy Crust) […]
[…] store these days. Sourdough has become part of my everyday kitchen, and I use it for staples like sourdough bread, bagels, and pizza […]
[…] 👉 Sourdough Bread Recipe […]